需求分析
- 请用ListView和自定义Adapter实现下列页面(可以自行设计并添加元素,以丰富该页面) :
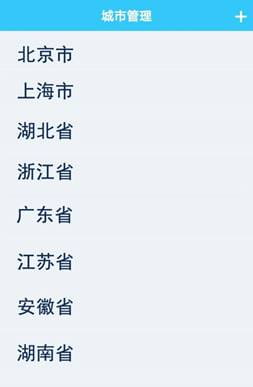
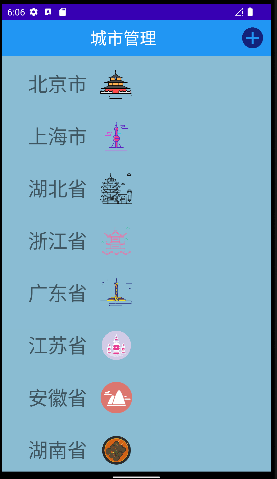
(1) 界面元素如图1所示,内容可以比图1更丰富
(2) 实现图1的界面列表和操作栏(Toolbar)
(3) 点击任意列表项,出现第二个页面,如图2所示(点击了“北京市”,出现北京市所有区的页面)
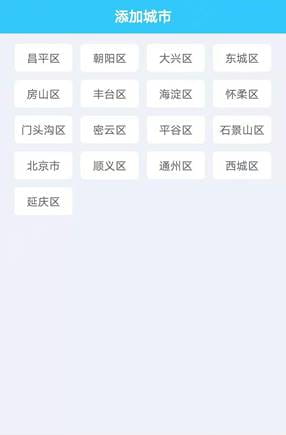
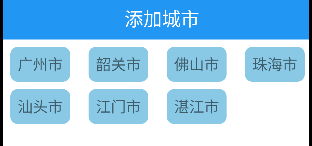
(4) 图2的内容请用GridView和自定义的Adapter实现。
(5) 实现图2 的Toolbar。
这里我反复看了几次,这里的toolbar只要求设置一个样式而已,并不用编写什么实质的功能,重点是listview和gridview的实现,和两个页面界面间交互
设计
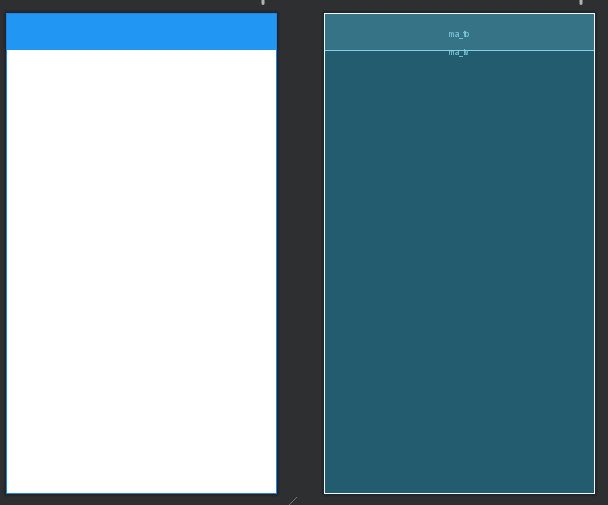
界面一布局文件的设计
- 因为toolbar和actionbar互相冲突会造成闪退,首先要在themes.xml主题布局文件中设置一个NoActionBar的style,这里项目规模比较小,我们把默认所以Activity采用主题style直接改成改成NoActionBar。
1
2
3
4
5
6
7
8
9
10
11
12
13
14
15
16
| <resources xmlns:tools="http://schemas.android.com/tools">
<style name="Theme.Test6" parent="Theme.MaterialComponents.DayNight.NoActionBar">
<item name="colorPrimary">@color/purple_500</item>
<item name="colorPrimaryVariant">@color/purple_700</item>
<item name="colorOnPrimary">@color/white</item>
<item name="colorSecondary">@color/teal_200</item>
<item name="colorSecondaryVariant">@color/teal_700</item>
<item name="colorOnSecondary">@color/black</item>
<item name="android:statusBarColor" tools:targetApi="l">?attr/colorPrimaryVariant</item>
</style>
</resources>
|
1
2
3
4
5
6
7
8
9
10
11
12
13
14
15
16
17
18
19
20
21
22
23
24
| <?xml version="1.0" encoding="utf-8"?>
<androidx.constraintlayout.widget.ConstraintLayout xmlns:android="http://schemas.android.com/apk/res/android"
xmlns:app="http://schemas.android.com/apk/res-auto"
xmlns:tools="http://schemas.android.com/tools"
android:layout_width="match_parent"
android:layout_height="match_parent"
tools:context=".MainActivity">
<androidx.appcompat.widget.Toolbar
android:id="@+id/ma_tb"
android:layout_width="match_parent"
android:layout_height="?actionBarSize"
android:background="#2196F3"
app:layout_constraintTop_toTopOf="parent"
app:layout_constraintStart_toStartOf="parent"/>
<ListView
android:layout_width="match_parent"
android:layout_height="wrap_content"
android:id="@+id/ma_lv"
app:layout_constraintTop_toBottomOf="@id/ma_tb"
android:choiceMode="singleChoice"
app:layout_constraintStart_toStartOf="parent"/>
</androidx.constraintlayout.widget.ConstraintLayout>
|
1
2
3
4
5
6
7
8
9
10
11
12
13
14
15
16
17
18
19
20
21
22
23
24
25
26
27
28
29
30
31
| <?xml version="1.0" encoding="utf-8"?>
<androidx.constraintlayout.widget.ConstraintLayout xmlns:android="http://schemas.android.com/apk/res/android"
xmlns:tools="http://schemas.android.com/tools"
android:layout_width="match_parent"
android:layout_height="match_parent"
xmlns:app="http://schemas.android.com/apk/res-auto">
<TextView
android:id="@+id/item_tv"
android:layout_width="wrap_content"
android:layout_height="wrap_content"
android:text="测试"
android:layout_marginTop="5dp"
android:gravity="center"
android:layout_marginStart="40dp"
android:textSize="30sp"
app:layout_constraintEnd_toStartOf="@+id/item_iv"
app:layout_constraintStart_toStartOf="parent"
app:layout_constraintTop_toTopOf="parent" />
<ImageView
android:layout_marginStart="10dp"
android:id="@+id/item_iv"
android:layout_width="128px"
android:layout_height="128px"
app:layout_constraintStart_toEndOf="@id/item_tv"
app:layout_constraintTop_toTopOf="parent"
/>
</androidx.constraintlayout.widget.ConstraintLayout>
|
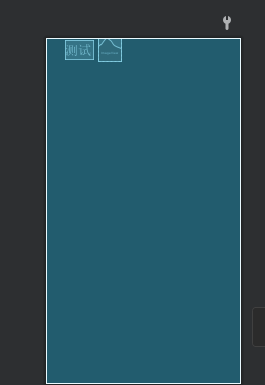
界面一功能实现
- 这里我们本应该设计省份和城市作为两个实体类,区分开两个列表的,但是这是个练习,为了减少重复的无用代码,我们把城市和省份都复用City实体类
- 这里写了两个构造函数,分别给有图的省份和无图的城市使用
1
2
3
4
5
6
7
8
9
10
11
12
13
14
15
16
17
18
19
20
21
22
23
24
25
26
27
28
29
30
31
32
| package com.gallifrey.test6;
public class City {
private String name;
private int imageId;
public City(String name, int imageId) {
this.name = name;
this.imageId = imageId;
}
public City(String name) {
this.name=name;
}
public String getName() {
return name;
}
public void setName(String name) {
this.name = name;
}
public int getImageId() {
return imageId;
}
public void setImageId(int imageId) {
this.imageId = imageId;
}
}
|
1
2
3
4
5
6
7
8
9
10
11
12
13
14
15
16
17
18
19
20
21
22
23
24
25
26
27
28
29
30
31
32
33
34
35
36
37
38
39
40
41
42
43
44
45
46
47
48
49
50
51
52
53
54
55
56
57
58
59
60
61
62
63
64
65
| package com.gallifrey.test6;
import android.content.Context;
import android.view.LayoutInflater;
import android.view.View;
import android.view.ViewGroup;
import android.widget.BaseAdapter;
import android.widget.ImageView;
import android.widget.TextView;
import androidx.recyclerview.widget.RecyclerView;
import java.util.LinkedList;
public class CityAdapter extends BaseAdapter {
private LinkedList<City> data;
private Context context;
public CityAdapter(LinkedList<City> data, Context context) {
this.data = data;
this.context = context;
}
@Override
public int getCount() {
return data.size();
}
@Override
public Object getItem(int i) {
return data.get(i);
}
@Override
public long getItemId(int i) {
return i;
}
@Override
public View getView(int i, View view, ViewGroup viewGroup) {
ViewHolder viewHolder=null;
if(view==null){
view= LayoutInflater.from(context).inflate(R.layout.listitem,viewGroup,false);
viewHolder=new ViewHolder();
viewHolder.imageView=view.findViewById(R.id.item_iv);
viewHolder.textView=view.findViewById(R.id.item_tv);
view.setTag(viewHolder);
}else{
viewHolder= (ViewHolder) view.getTag();
}
viewHolder.textView.setText(data.get(i).getName());
viewHolder.imageView.setImageResource(data.get(i).getImageId());
return view;
}
static class ViewHolder {
private ImageView imageView;
private TextView textView;
}
}
|
- 这里要注意toolbar引入的类是
androidx.appcompat.widget.Toolbar,弄错就闪退了,另外前面的NoActionbar没有设置也是会闪退的。
- 当然因为的toolbar没有什么实质功能,这个toolbar的菜单图标,你在xml中用imageview加上图标也是可以的。
- 这里我们跳转页面前先设置一个变量,这样我们在跳转页面二时能加载对应的数据
1
2
3
4
5
6
7
8
9
10
11
12
13
14
15
16
17
18
19
20
21
22
23
24
25
26
27
28
29
30
31
32
33
34
35
36
37
38
39
40
41
42
43
44
45
46
47
48
49
50
51
52
53
54
55
56
57
58
59
60
61
62
63
64
65
66
67
68
69
70
71
72
73
74
75
76
| package com.gallifrey.test6;
import androidx.annotation.NonNull;
import androidx.appcompat.app.AppCompatActivity;
import android.content.Intent;
import android.os.Bundle;
import android.view.Menu;
import android.view.MenuItem;
import android.view.View;
import android.widget.AdapterView;
import android.widget.ListView;
import androidx.appcompat.widget.Toolbar;
import java.util.LinkedList;
public class MainActivity extends AppCompatActivity {
public static int whichCity=0;
private LinkedList<City> cityLinkedList;
private Toolbar toolbar;
private ListView mlv;
@Override
protected void onCreate(Bundle savedInstanceState) {
super.onCreate(savedInstanceState);
setContentView(R.layout.activity_main);
toolbar=findViewById(R.id.ma_tb);
mlv=findViewById(R.id.ma_lv);
toolbar.setTitle("城市管理");
setSupportActionBar(toolbar);
initCity();
mlv.setAdapter(new CityAdapter(cityLinkedList,this));
mlv.setOnItemClickListener(new AdapterView.OnItemClickListener() {
@Override
public void onItemClick(AdapterView<?> adapterView, View view, int i, long l) {
Intent intent=new Intent(MainActivity.this,SecondActivity.class);
whichCity=i;
startActivity(intent);
}
});
}
@Override
public boolean onCreateOptionsMenu(Menu menu) {
getMenuInflater().inflate(R.menu.toolbar_menu,menu);
return super.onCreateOptionsMenu(menu);
}
private void initCity() {
cityLinkedList=new LinkedList<>();
cityLinkedList.add(new City("北京市",R.drawable.beijing));
cityLinkedList.add(new City("上海市",R.drawable.shanghai));
cityLinkedList.add(new City("湖北省",R.drawable.hubei));
cityLinkedList.add(new City("浙江省",R.drawable.zhengjiang));
cityLinkedList.add(new City("广东省",R.drawable.guangdong));
cityLinkedList.add(new City("江苏省",R.drawable.jiangsu));
cityLinkedList.add(new City("安徽省",R.drawable.anhui));
cityLinkedList.add(new City("湖南省",R.drawable.hunan));
}
}
|
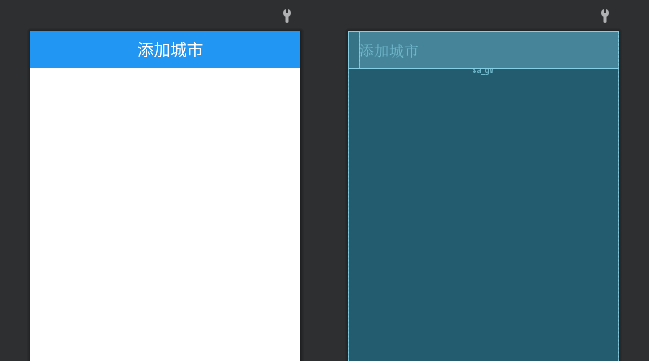
界面二布局文件的设计
1
2
3
4
5
6
7
8
9
10
11
12
13
14
15
16
17
18
19
20
21
22
23
24
25
26
27
28
29
30
31
32
33
34
35
| <?xml version="1.0" encoding="utf-8"?>
<androidx.constraintlayout.widget.ConstraintLayout xmlns:android="http://schemas.android.com/apk/res/android"
xmlns:app="http://schemas.android.com/apk/res-auto"
xmlns:tools="http://schemas.android.com/tools"
android:layout_width="match_parent"
android:layout_height="match_parent"
tools:context=".SecondActivity">
<androidx.appcompat.widget.Toolbar
android:id="@+id/sa_tb"
android:layout_width="match_parent"
android:layout_height="?actionBarSize"
android:background="#2196F3"
app:layout_constraintTop_toTopOf="parent"
app:layout_constraintStart_toStartOf="parent">
<TextView
android:layout_width="match_parent"
android:layout_height="match_parent"
android:textSize="25sp"
android:text="添加城市"
android:textColor="@color/white"
android:gravity="center"
/>
</androidx.appcompat.widget.Toolbar>
<GridView
android:id="@+id/sa_gv"
android:layout_width="match_parent"
android:layout_height="wrap_content"
app:layout_constraintTop_toBottomOf="@id/sa_tb"
android:numColumns="4"
android:horizontalSpacing="10dp"
app:layout_constraintStart_toStartOf="parent"/>
</androidx.constraintlayout.widget.ConstraintLayout>
|
1
2
3
4
5
6
7
8
9
10
11
12
13
14
15
16
17
18
19
20
21
22
| <?xml version="1.0" encoding="utf-8"?>
<androidx.constraintlayout.widget.ConstraintLayout xmlns:android="http://schemas.android.com/apk/res/android"
android:layout_width="match_parent"
android:layout_height="match_parent"
xmlns:app="http://schemas.android.com/apk/res-auto">
<TextView
android:layout_margin="10dp"
android:id="@+id/gridview_item_tv"
android:layout_width="wrap_content"
android:layout_height="wrap_content"
android:padding="10dp"
android:gravity="center"
android:text="测一"
android:textSize="20sp"
android:background="@drawable/radius"
app:layout_constraintStart_toStartOf="parent"
app:layout_constraintTop_toTopOf="parent"
/>
</androidx.constraintlayout.widget.ConstraintLayout>
|
1
2
3
4
5
| <?xml version="1.0" encoding="utf-8"?>
<shape xmlns:android="http://schemas.android.com/apk/res/android">
<corners android:radius="10dp"/>
<solid android:color="#89C9E6"></solid>
</shape>
|
页面二功能实现
1
2
3
4
5
6
7
8
9
10
11
12
13
14
15
16
17
18
19
20
21
22
23
24
25
26
27
28
29
30
31
32
33
34
35
36
37
38
39
40
41
42
43
44
45
46
47
48
49
50
51
52
53
54
55
56
57
58
59
60
61
| package com.gallifrey.test6;
import android.content.Context;
import android.view.LayoutInflater;
import android.view.View;
import android.view.ViewGroup;
import android.widget.BaseAdapter;
import android.widget.ImageView;
import android.widget.TextView;
import java.util.LinkedList;
public class GridViewCityAdapter extends BaseAdapter {
private LinkedList<City> data;
private Context context;
public GridViewCityAdapter(LinkedList<City> data, Context context) {
this.data = data;
this.context = context;
}
@Override
public int getCount() {
return data.size();
}
@Override
public Object getItem(int i) {
return data.get(i);
}
@Override
public long getItemId(int i) {
return i;
}
@Override
public View getView(int i, View view, ViewGroup viewGroup) {
ViewHolder viewHolder=null;
if(view==null){
view= LayoutInflater.from(context).inflate(R.layout.gridview_listitem,viewGroup,false);
viewHolder=new ViewHolder();
viewHolder.textView=view.findViewById(R.id.gridview_item_tv);
view.setTag(viewHolder);
}else{
viewHolder= (ViewHolder) view.getTag();
}
viewHolder.textView.setText(data.get(i).getName());
return view;
}
static class ViewHolder {
private TextView textView;
}
}
|
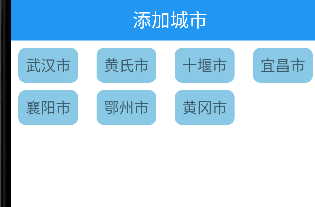
- 这里利用页面一Activity实现跳转时的变量来决定加载哪些城市数据
- 因为城市太多了,我这里每个省份都只写了七个城市
1
2
3
4
5
6
7
8
9
10
11
12
13
14
15
16
17
18
19
20
21
22
23
24
25
26
27
28
29
30
31
32
33
34
35
36
37
38
39
40
41
42
43
44
45
46
47
48
49
50
51
52
53
54
55
56
57
58
59
60
61
62
63
64
65
66
67
68
69
70
71
72
73
74
75
76
77
78
79
80
81
82
83
84
85
86
87
88
89
90
91
92
93
94
95
96
97
98
99
100
101
102
103
104
105
106
107
108
109
110
111
112
113
114
115
116
117
118
| package com.gallifrey.test6;
import androidx.appcompat.app.AppCompatActivity;
import android.os.Bundle;
import android.widget.GridView;
import java.util.LinkedList;
public class SecondActivity extends AppCompatActivity {
private LinkedList<City> cityLinkedList;
private GridView gridView;
@Override
protected void onCreate(Bundle savedInstanceState) {
super.onCreate(savedInstanceState);
setContentView(R.layout.activity_second);
gridView=findViewById(R.id.sa_gv);
initCity(MainActivity.whichCity);
gridView.setAdapter(new GridViewCityAdapter(cityLinkedList,this));
}
private void initCity(int whichCity) {
switch (whichCity){
case 0:
cityLinkedList=new LinkedList<>();
cityLinkedList.add(new City("东城区"));
cityLinkedList.add(new City("西城区"));
cityLinkedList.add(new City("朝阳区"));
cityLinkedList.add(new City("丰台区"));
cityLinkedList.add(new City("石景山"));
cityLinkedList.add(new City("海淀区"));
cityLinkedList.add(new City("顺义区"));
cityLinkedList.add(new City("通州区"));
cityLinkedList.add(new City("大兴区"));
break;
case 1:
cityLinkedList=new LinkedList<>();
cityLinkedList.add(new City("黄埔区"));
cityLinkedList.add(new City("徐汇区"));
cityLinkedList.add(new City("长宁区"));
cityLinkedList.add(new City("静安区"));
cityLinkedList.add(new City("普陀山"));
cityLinkedList.add(new City("虹口区"));
cityLinkedList.add(new City("杨浦区"));
break;
case 2:
cityLinkedList=new LinkedList<>();
cityLinkedList.add(new City("武汉市"));
cityLinkedList.add(new City("黄氏市"));
cityLinkedList.add(new City("十堰市"));
cityLinkedList.add(new City("宜昌市"));
cityLinkedList.add(new City("襄阳市"));
cityLinkedList.add(new City("鄂州市"));
cityLinkedList.add(new City("黄冈市"));
break;
case 3:
cityLinkedList=new LinkedList<>();
cityLinkedList.add(new City("杭州市"));
cityLinkedList.add(new City("宁波市"));
cityLinkedList.add(new City("温州市"));
cityLinkedList.add(new City("嘉兴市"));
cityLinkedList.add(new City("湖州市"));
cityLinkedList.add(new City("绍兴市"));
cityLinkedList.add(new City("金华市"));
break;
case 4:
cityLinkedList=new LinkedList<>();
cityLinkedList.add(new City("广州市"));
cityLinkedList.add(new City("韶关市"));
cityLinkedList.add(new City("佛山市"));
cityLinkedList.add(new City("珠海市"));
cityLinkedList.add(new City("汕头市"));
cityLinkedList.add(new City("江门市"));
cityLinkedList.add(new City("湛江市"));
break;
case 5:
cityLinkedList=new LinkedList<>();
cityLinkedList.add(new City("南京市"));
cityLinkedList.add(new City("无锡市"));
cityLinkedList.add(new City("徐州市"));
cityLinkedList.add(new City("常州市"));
cityLinkedList.add(new City("苏州市"));
cityLinkedList.add(new City("南通市"));
cityLinkedList.add(new City("淮安市"));
break;
case 6:
cityLinkedList=new LinkedList<>();
cityLinkedList.add(new City("合肥市"));
cityLinkedList.add(new City("芜湖市"));
cityLinkedList.add(new City("蚌埠市"));
cityLinkedList.add(new City("淮南市"));
cityLinkedList.add(new City("淮北市"));
cityLinkedList.add(new City("安庆市"));
cityLinkedList.add(new City("铜陵市"));
break;
case 7:
cityLinkedList=new LinkedList<>();
cityLinkedList.add(new City("长沙市"));
cityLinkedList.add(new City("株洲市"));
cityLinkedList.add(new City("湘潭市"));
cityLinkedList.add(new City("衡阳市"));
cityLinkedList.add(new City("昭阳市"));
cityLinkedList.add(new City("岳阳市"));
cityLinkedList.add(new City("杨永州"));
break;
}
}
}
|
最终效果


 wechat
 alipay