练习一

需求分析

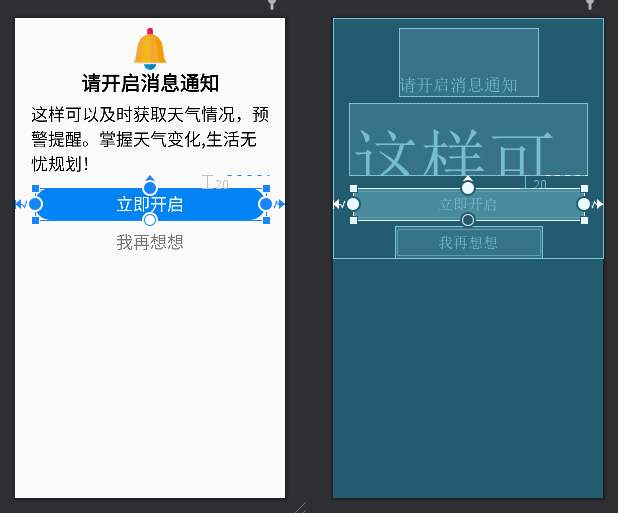
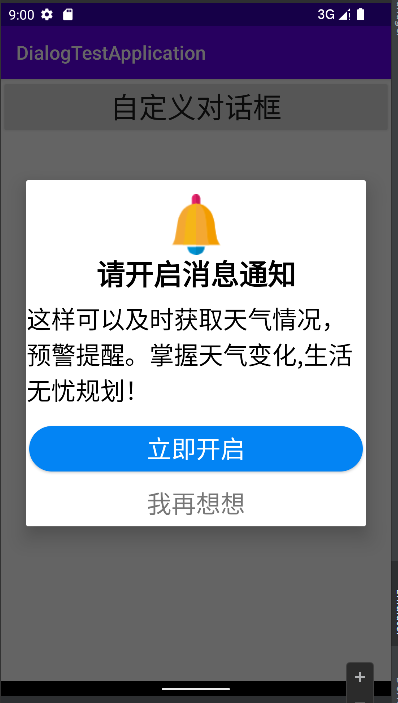
  • 下面是弹出的提示对话框的内容(背景为白色的提示对话框),请自行设计布局文件,要求满足 :

image-20220406031446645

  1. 界面元素如图所示,图片文件请自行选择任意图片替换
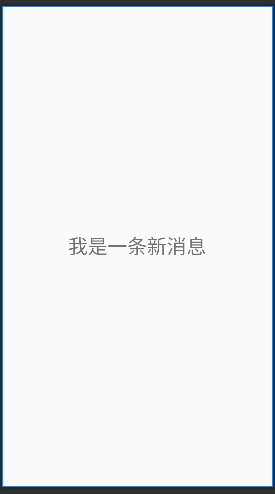
  2. 点击“立即开启”,弹出新的Activity,内容为“我是一条新消息”
  3. 点击“我再想想”,关闭对话框。

设计

对话框布局

  • 这里先在layout目录下新建一个xml文件设计弹出的对话框布局

  • 这里button的background用了自定的drawable文件效果,要修改themes.xml文件里的parent属性才能显示自定效果

1
<style name="Theme.DialogTestApplication" parent="Theme.AppCompat.DayNight.DarkActionBar">

image-20220406035745181

1
2
3
4
5
6
7
8
9
10
11
12
13
14
15
16
17
18
19
20
21
22
23
24
25
26
27
28
29
30
31
32
33
34
35
36
37
38
39
40
41
42
43
44
45
46
47
48
49
50
51
52
53
54
55
56
57
58
59
60
61
62
63
64
65
66
67
<?xml version="1.0" encoding="utf-8"?>
<androidx.constraintlayout.widget.ConstraintLayout xmlns:android="http://schemas.android.com/apk/res/android"
android:layout_width="match_parent"
android:layout_height="wrap_content"
xmlns:tools="http://schemas.android.com/tools"
xmlns:app="http://schemas.android.com/apk/res-auto"
tools:context=".MainActivity">

<TextView
android:id="@+id/custom_tv1"
android:layout_width="wrap_content"
android:layout_height="wrap_content"
android:layout_marginTop="15dp"
android:drawableTop="@drawable/lingdang"
android:text="请开启消息通知"
android:textStyle="bold"
android:textColor="@color/black"
android:textSize="30sp"
app:layout_constraintEnd_toEndOf="parent"
app:layout_constraintStart_toStartOf="parent"
app:layout_constraintTop_toTopOf="parent" />

<TextView
android:id="@+id/custom_tv2"
android:layout_marginTop="10dp"
app:layout_constraintTop_toBottomOf="@id/custom_tv1"
android:layout_width="wrap_content"
android:layout_height="wrap_content"
android:textColor="@color/black"
app:layout_constraintStart_toStartOf="parent"
android:layout_marginStart="10dp"
android:layout_marginEnd="10dp"
app:layout_constraintEnd_toEndOf="parent"
android:text="这样可以及时获取天气情况,预警提醒。掌握天气变化,生活无忧规划!"
android:textSize="26sp"/>

<Button
android:id="@+id/custom_btn1"
app:layout_constraintTop_toBottomOf="@id/custom_tv2"
app:layout_constraintStart_toStartOf="parent"
app:layout_constraintEnd_toEndOf="parent"
android:text="立即开启"
android:textColor="@color/white"
android:background="@drawable/btn_round"
android:layout_marginTop="20dp"
android:paddingHorizontal="124dp"
android:textSize="26sp"
android:layout_width="wrap_content"
android:layout_height="wrap_content"/>

<Button
android:textColor="#88000000"
android:id="@+id/custom_btn2"
app:layout_constraintTop_toBottomOf="@id/custom_btn1"
app:layout_constraintStart_toStartOf="parent"
app:layout_constraintEnd_toEndOf="parent"
android:text="我再想想"
android:background="@null"
android:layout_marginTop="10dp"
android:paddingHorizontal="60dp"
android:textSize="26sp"
android:layout_width="wrap_content"
android:layout_height="wrap_content"
android:layout_marginBottom="20dp"
/>

</androidx.constraintlayout.widget.ConstraintLayout>
  • 在drawable目录下新建btn_round.xml文件,添加一个按钮样式
1
2
3
4
5
<?xml version="1.0" encoding="utf-8"?>
<shape xmlns:android="http://schemas.android.com/apk/res/android">
<solid android:color="#0384F4"/>
<corners android:radius="25dp"/>
</shape>

跳转页面

  • 新建一个activity,作为跳转页面

image-20220406043730358

1
2
3
4
5
6
7
8
9
10
11
12
13
14
15
16
<?xml version="1.0" encoding="utf-8"?>
<RelativeLayout xmlns:android="http://schemas.android.com/apk/res/android"
xmlns:app="http://schemas.android.com/apk/res-auto"
xmlns:tools="http://schemas.android.com/tools"
android:layout_width="match_parent"
android:layout_height="match_parent"
tools:context=".SecondActivity">
<TextView
android:layout_width="match_parent"
android:layout_height="wrap_content"
android:layout_centerHorizontal="true"
android:layout_centerVertical="true"
android:text="我是一条新消息"
android:gravity="center"
android:textSize="30sp"/>
</RelativeLayout>

触发对话框按钮

  • 在MainActivity添加一个触发弹出对话框的按钮

image-20220406043530799

1
2
3
4
5
6
7
8
9
10
11
12
13
14
15
16
<?xml version="1.0" encoding="utf-8"?>
<LinearLayout xmlns:android="http://schemas.android.com/apk/res/android"
xmlns:app="http://schemas.android.com/apk/res-auto"
xmlns:tools="http://schemas.android.com/tools"
android:layout_width="match_parent"
android:layout_height="match_parent"
android:orientation="vertical"
tools:context=".MainActivity">
<Button
android:layout_width="match_parent"
android:layout_height="wrap_content"
android:text="自定义对话框"
android:textSize="30sp"
android:id="@+id/btn_custom"
/>
</LinearLayout>

Dialog动态加载及监听设置

  • 在MainActivity关联组件,设置监听,动态加载dialog并显示。

image-20220406050016620

1
2
3
4
5
6
7
8
9
10
11
12
13
14
15
16
17
18
19
20
21
22
23
24
25
26
27
28
29
30
31
32
33
34
35
36
37
38
39
40
41
42
43
44
45
46
47
48
49
50
51
package com.gallifrey.dialogtestapplication;

import androidx.appcompat.app.AlertDialog;
import androidx.appcompat.app.AppCompatActivity;

import android.content.Intent;
import android.os.Bundle;
import android.view.LayoutInflater;
import android.view.View;
import android.widget.Button;


public class MainActivity extends AppCompatActivity {
private Button mBtnCustom;
@Override
protected void onCreate(Bundle savedInstanceState) {
super.onCreate(savedInstanceState);
setContentView(R.layout.activity_main);

mBtnCustom=findViewById(R.id.btn_custom);

mBtnCustom.setOnClickListener(new View.OnClickListener() {
@Override
public void onClick(View view) {
//动态加载
view= LayoutInflater.from(MainActivity.this).inflate(R.layout.layout_custom,null,false);
AlertDialog.Builder customDialog=new AlertDialog.Builder(MainActivity.this);
Button customBtn1=view.findViewById(R.id.custom_btn1);
Button customBtn2=view.findViewById(R.id.custom_btn2);
customDialog.setView(view).show();
//给两个按钮分别添加监听
customBtn1.setOnClickListener(new View.OnClickListener() {
@Override
public void onClick(View view) {
//实现页面跳转
Intent intent=new Intent(MainActivity.this,SecondActivity.class);
startActivity(intent);
}
});

customBtn2.setOnClickListener(new View.OnClickListener() {
@Override
public void onClick(View view) {
finish();
}
});
}
});
}

}

练习二

需求分析

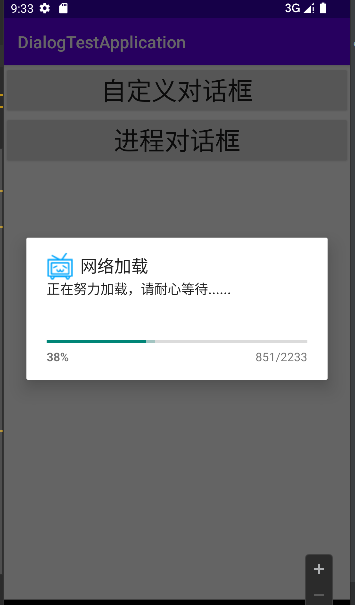
  • 根据下图,弹出进度对话框
  1. 界面元素的效果如图所示,图标可以用任意图案替换
  2. 要求进度条能发生模拟进度变化。

img

设计

添加弹出按钮

  • 在原来MainActivity里面再加一个弹出按钮

image-20220406051520338

1
2
3
4
5
6
7
<Button
android:layout_width="match_parent"
android:layout_height="wrap_content"
android:text="进程对话框"
android:textSize="30sp"
android:id="@+id/btn_progress"
/>

设计进程对话框

  • 进程对话框直接在Activity类中写java代码就可以实现了

image-20220406053348085

1
2
3
4
5
6
7
8
9
10
11
12
13
14
15
16
17
18
19
20
21
22
23
24
25
26
27
28
29
mBtnProgress=findViewById(R.id.btn_progress);
mBtnProgress.setOnClickListener(new View.OnClickListener() {
@Override
public void onClick(View view) {
ProgressDialog progressDialog=new ProgressDialog(MainActivity.this);

progressDialog.setIcon(R.mipmap.bilibili);
progressDialog.setTitle("网络加载");
progressDialog.setMessage("正在努力加载,请耐心等待......");
progressDialog.setProgressStyle(ProgressDialog.STYLE_HORIZONTAL); //设置水平条进度条
progressDialog.setProgress(0);//设置初始值
progressDialog.setSecondaryProgress(5);//设置二级进度条的初始值
progressDialog.setMax(2233);//设置最大值
progressDialog.show();//显示
//这里尝试一下lamda表达式的写法
new Thread(()->{
while(progressDialog.getProgress()<progressDialog.getMax()){
try {
Thread.sleep(100);//间隔100毫秒
progressDialog.incrementProgressBy(23);//一级进度条增长值
progressDialog.incrementSecondaryProgressBy(25);//二级进度增长值
} catch (InterruptedException e) {
e.printStackTrace();
}

}
}).start();//记得start
}
});